For the impatient...
Fifth Year Pics - see below. :(
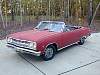
What a saga... I looked around for a nice '65 convertible for a few years and it seemed that everything that hit the market was either a mega-buck restoration or some level of junk. Finding a low-price original that just needed a few things seemed impossible to find. More often than not, people were pimping their "rattle can restoration" projects that hardly qualified.
I found this car on ebay in the fall of '03. Having done bodywork and owned a number of classic cars before, I was confident from the pictures taken by the owner at the time that this wouldn't be more than a one-year project. Ugh. Four years later, I'm over halfway into it. It's come a long way from day 1, as you can see. As a human, I needed to learn patience, so that's my justification for taking on (and continuing) such a huge project. Needless to say, this thing was in much worse shape than expected and is naturally taking longer to rebuild.
Some hard-learned lessons that are worth repeating (some of these I already knew, but refused to follow... DUH!)
The plans for the car are to make it once again structurally sound (if not more sound than the factory by reinforcing some key supports and fully welding other places), refinish or replace all chrome parts, rebuild the entire powertrain, etc. I've not yet decided what direction to go with the powertrain... but it will be driven across the country when it's done. The interior will stay as stock as possible. I also haven't decided to stay with the factory regal red or change over to a metallic blue... decisions, decisions!
Hopefully you find these pictures useful... and can glean some of the tricks that I have learned over the years for fabrication. I find myself going back and referencing things. Drop me a note if you find them useful.
First Year Pics
Bulk of the disassembly and
passenger side reconstruction, front clip disassembly, hood, trunk removal.
Tearing into mess of trunk, pass side rocker panel, quarter panel, wheel
house. Fitting new trunk panels. Removal of bulk of the interior
including seats, console, carpet, door panels. Pass side floor supports
and floors. Reconstruction/fabrication of lower cowl area including lower
fender mount.
Second Year Pics
Driver side
reconstruction including rocker panel, floors, floor supports, front
body mount repair, lower cowl reconstruction, wiring and gauges
removal. Triangle window exploded views. Driver side quarter
panel removal, trunk floor extension replacement, wheelhouse
repair.
Third Year Pics
Finishing up driver side
rocker panel, quarter panel, wheel houses, finish stripping dash and
interior including convertible top, shifter detail, dropping frame off
body, stripping of firewall, removal of engine and transmission from
frame. Removal of windshield and a-pillar covers. Bulk of the cleanup
and final welding of the trunk and trunk floor supports, test-fit new
frame to body.
Fourth Year Pics
Detailed disassembly of the crappy '65 Olds(?) bucket seats I bought off eBay.
Welding new bucket seat brackets to the new floor pans with detailed measurements.
Cutting and welding in the new front windshield channel (front of the dash.) Body
work on the bulk of the underside of the floors - nice to see them finally smooth
and finished! Finalization of the bodywork inside the trunk including filler,
primer and fabrication of the old rear trunk opening braces. Some bodywork on the
driver rear taillight area and test fit of the new YearOne chrome trim and bumper!
Installation of the trunk floor drain plugs and liberal use of seam sealer. It's
tough being as sloppy as the factory was! Final
disassembly of the front and rear suspension, brake lines, etc from the old rusted
frame. Shew!
Fifth Year Pics
I got completely sidetracked in 2008 by my new business and only worked on the
malibu once the whole year. Yeah, totally shameful. My plan of attack
hasn't changed, I just need to find time to get back out in the garage. Sorry
for lack of progress for anyone who has been following this saga from day 1.
What is next? Over the next year, I plan to remove the new frame to finish up any last bodywork of the body underside, then clean, seal and paint it. The new frame will get stripped and painted and finally nestled under body for good. Then the fun begins... major bodywork including rehanging the doors, fenders, etc. Fun!
All text and pictures on lugnutz are copyright © 2005-2009 by lugnutz. All rights reserved. No content may be duplicated without express written permission.